Day 39 AWS and IAM Basics☁
AWS:
Amazon Web Services is one of the most popular Cloud Providers that has a free tier for students and Cloud enthusiasts for their Hands-on while learning (Create your free account today to explore more on it).
User Data in AWS:
When you launch an instance in Amazon EC2, you have the option of passing user data to the instance that can be used to perform common automated configuration tasks and even run scripts after the instance starts. You can pass two types of user data to Amazon EC2: shell scripts and cloud-init directives.
You can also pass this data into the launch instance wizard as plain text, as a file (this is useful for launching instances using the command line tools), or as base64-encoded text (for API calls).
This will save time and manual effort every time you launch an instance and want to install any application on it like Apache, docker, Jenkins, etc.
IAM:
AWS Identity and Access Management (IAM) is a web service that helps you securely control access to AWS resources. With IAM, you can centrally manage permissions that control which AWS resources users can access. You use IAM to control who is authenticated (signed in) and authorized (has permissions) to use resources.
Task1:
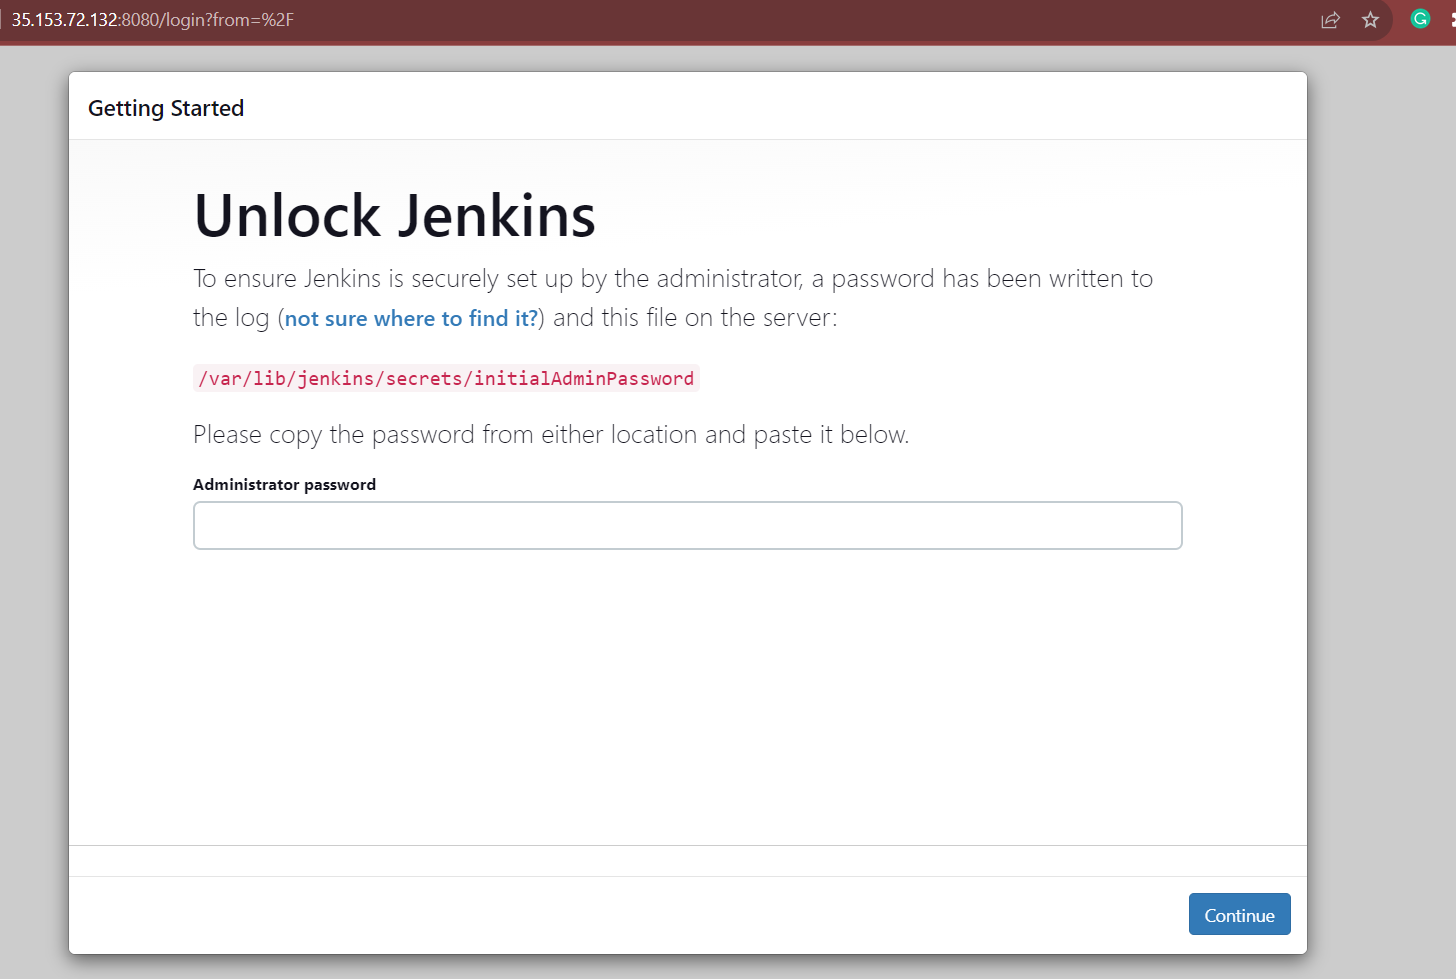
Launch EC2 instance with already installed Jenkins on it. Once server shows up in console, hit the IP address in browser and you Jenkins page should be visible.
Take screenshot of Userdata and Jenkins page, this will verify the task completion
Go to the EC2 dashboard after logging into the Amazon Management Console.
To begin the process of launching a new EC2 instance, click the "Launch Instance" button.
Choose a machine image from Amazon (AMI)
As we have already installed Jenkins.
Check if jenkins is running and jenkins version

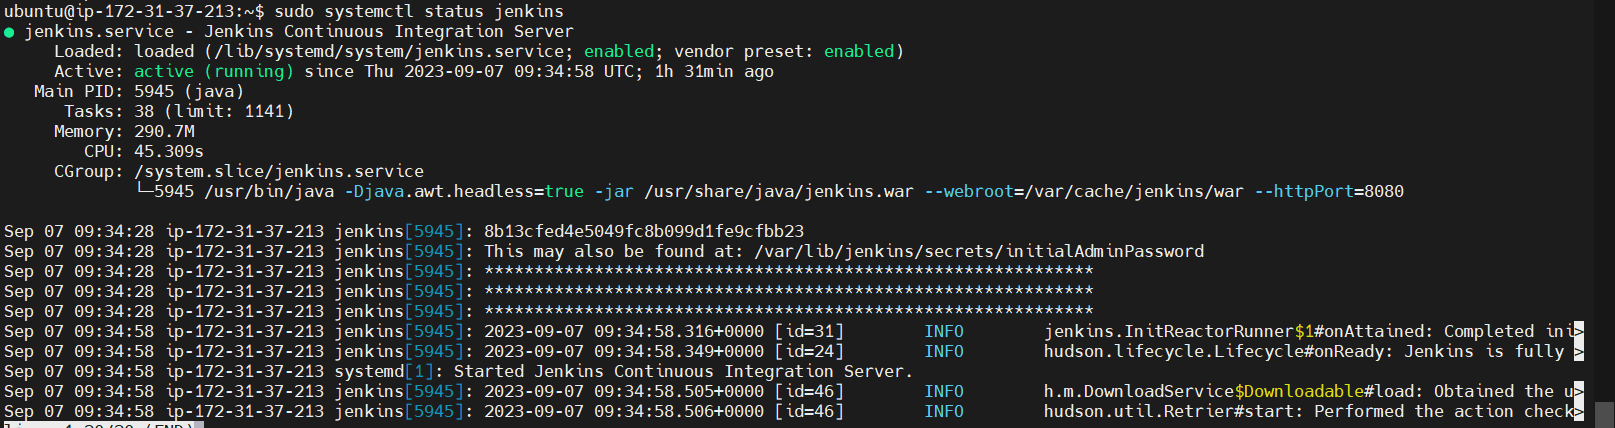
Jenkins is running .Now lets access portal for the same
Task2:
Read more on IAM Roles and explain the IAM users, groups, and roles in your own terms.
Users, groups, and roles may all be managed in your Amazon environment using the IAM (Identity and Access Management) service provided by AWS. These three elements work together to give your AWS resources fine-grained access control and permissions.
Users of IAM: For the individuals or programs who need access to your AWS resources, you can create individual AWS accounts called IAM users. User names, passwords, access keys, and permissions are all specific to each user, who also has their own set of security credentials. Users can be created, modified, and deleted as necessary, and you can give them particular permissions to utilize or administer AWS resources.
IAM Groups: Groups of IAM users make up IAM. By giving permissions to a group rather than to specific users, you can use groups to streamline permissions management. You could, for instance, make a group just for developers and give them access to certain resources. The group's permissions are automatically passed on to new members when you add them.
IAM Roles: IAM roles offer an additional method for controlling access to Amazon resources. Users and roles are similar, however, users are linked to a specific person or account, whereas roles are not. Instead, trusted entities like EC2 instances, Lambda functions, or other AWS services take on the duties. Permissions policies, which specify the particular permissions that a role is permitted to utilize, can be added to roles.
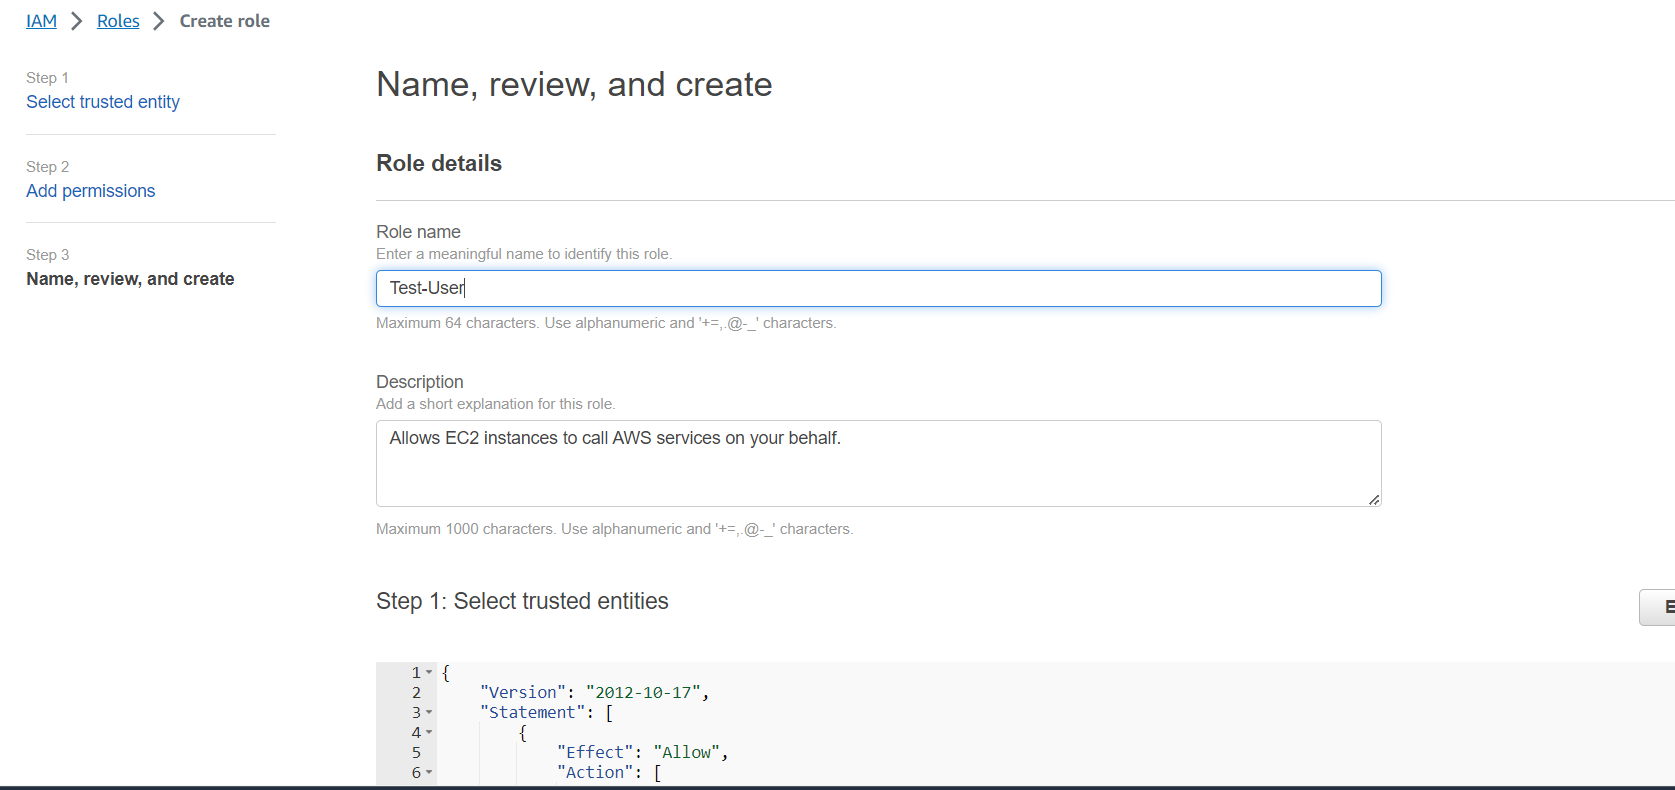
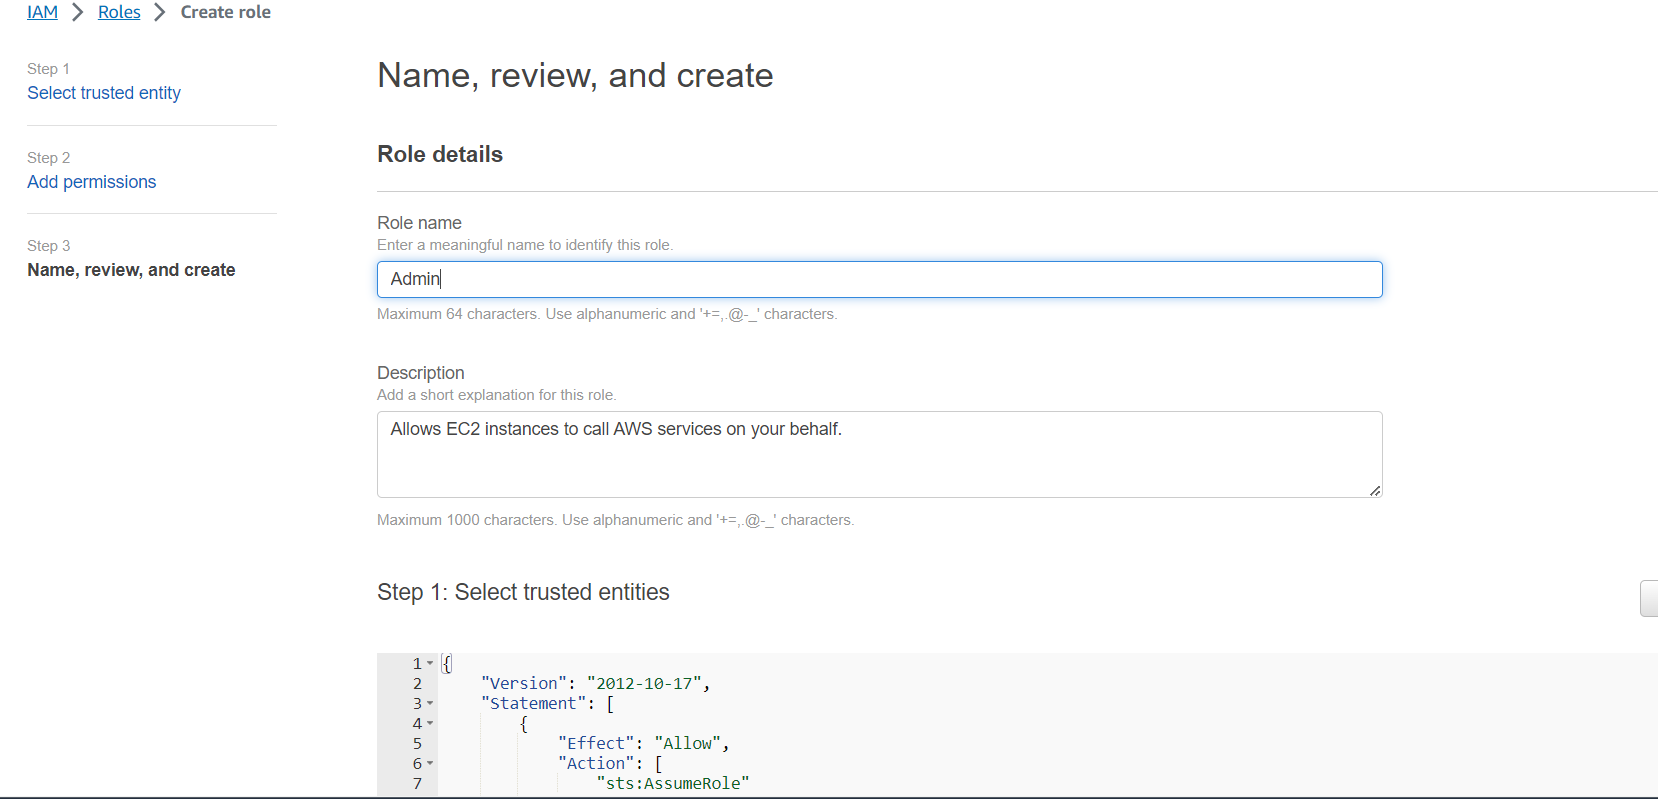
Create three roles named: DevOps-User, Test-User, and Admin.
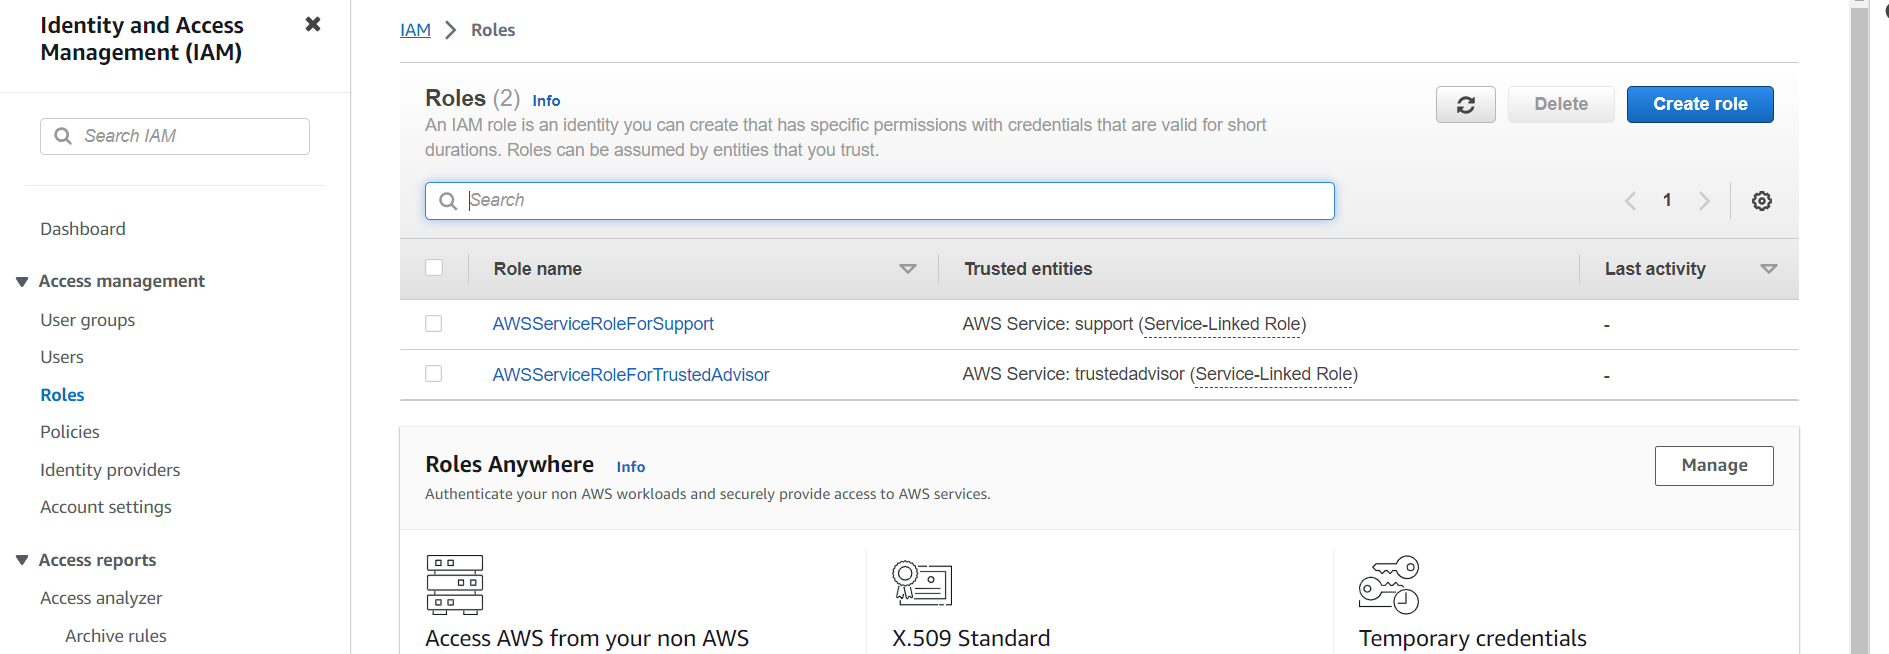
Go to the IAM dashboard after logging into the Amazon Management Console.
The "Create role" button may be found after selecting "Roles" from the left-hand menu.
Choose the appropriate use case for the role. For example, if you want to create a role for an EC2 instance, choose "AWS service" and then "EC2".
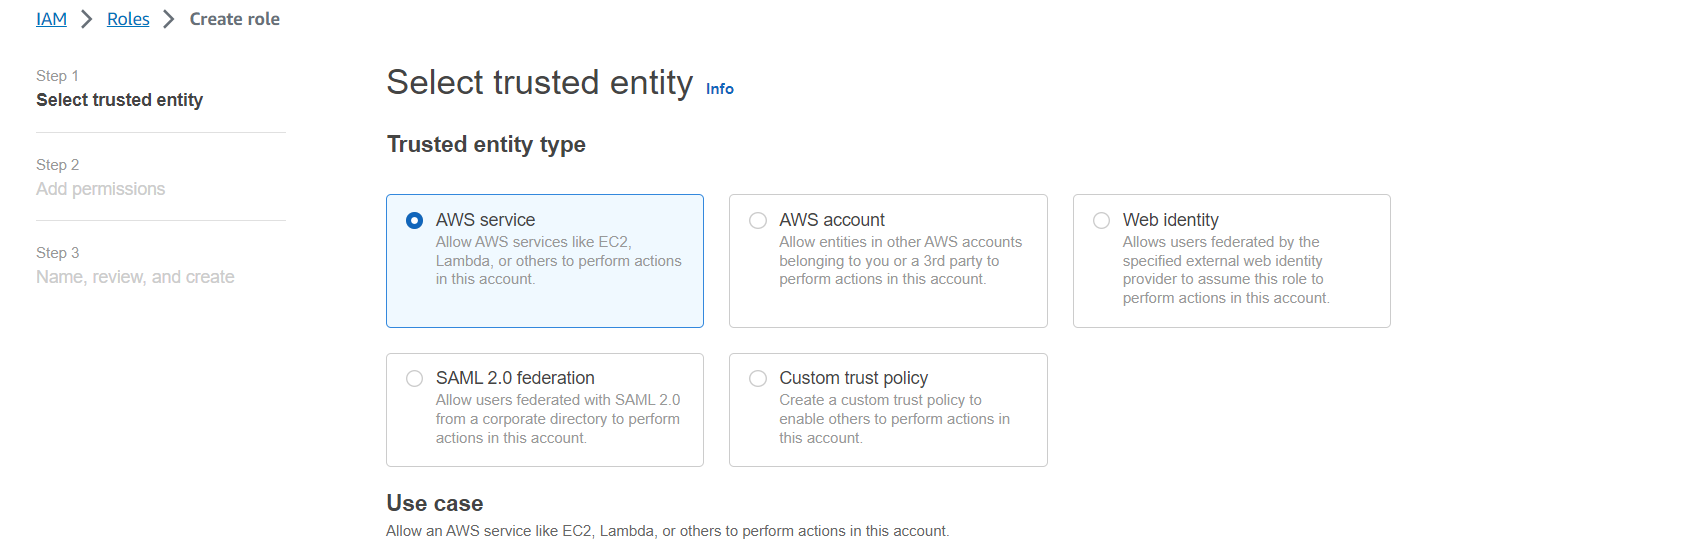
Choose the appropriate use case for the role. For example, if you want to create a role for an EC2 instance, choose "AWS service" and then "EC2".
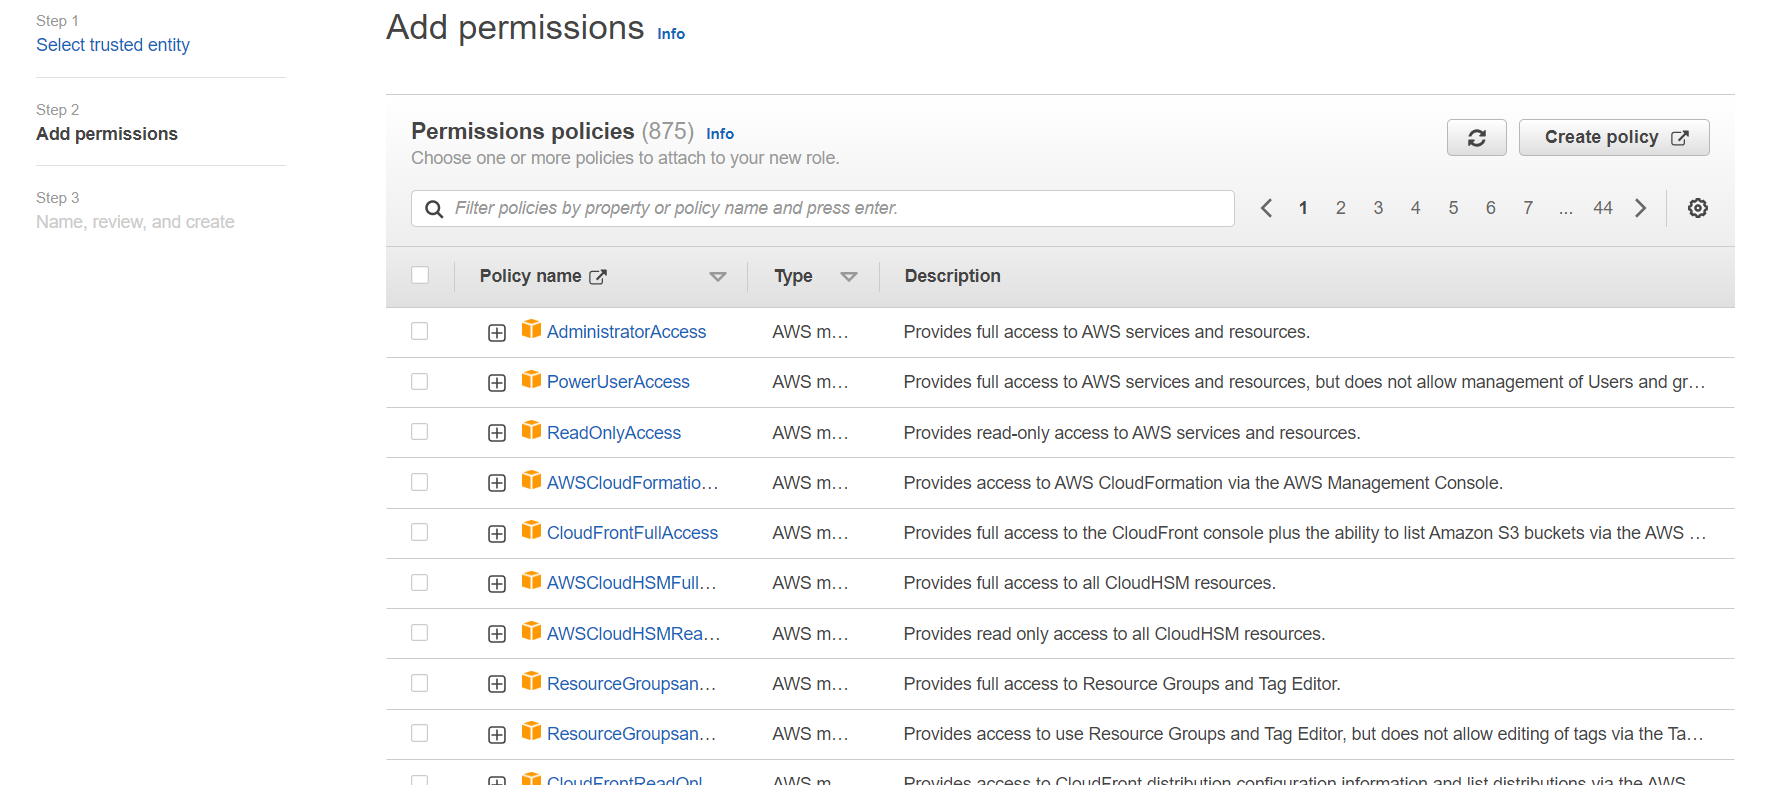
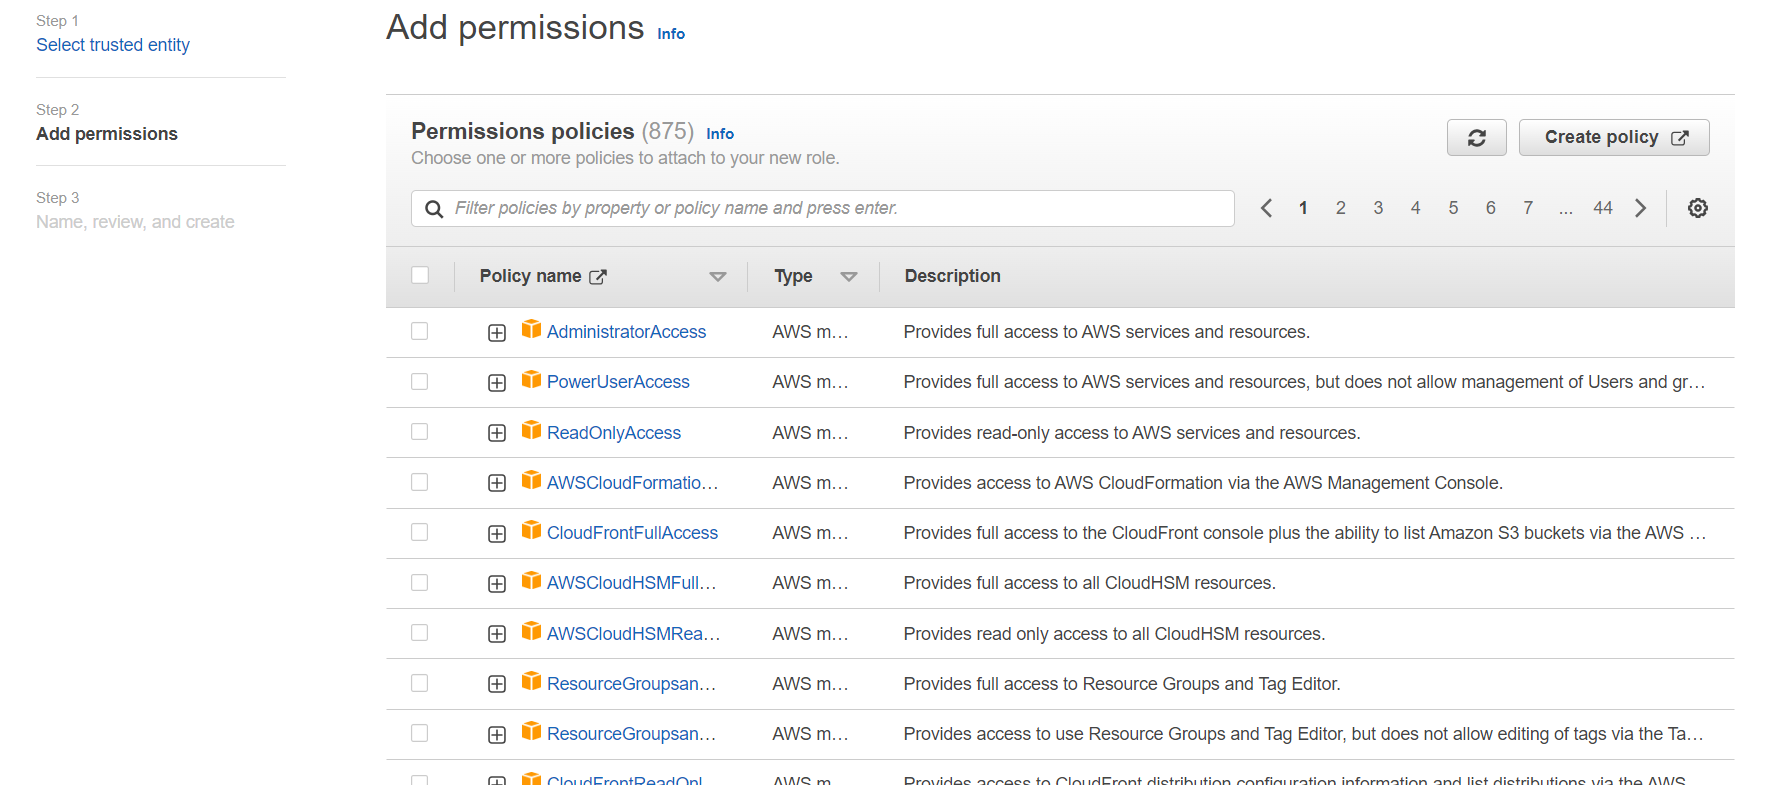
Select the appropriate permissions policies for the role. You can choose from existing policies or create a custom policy.
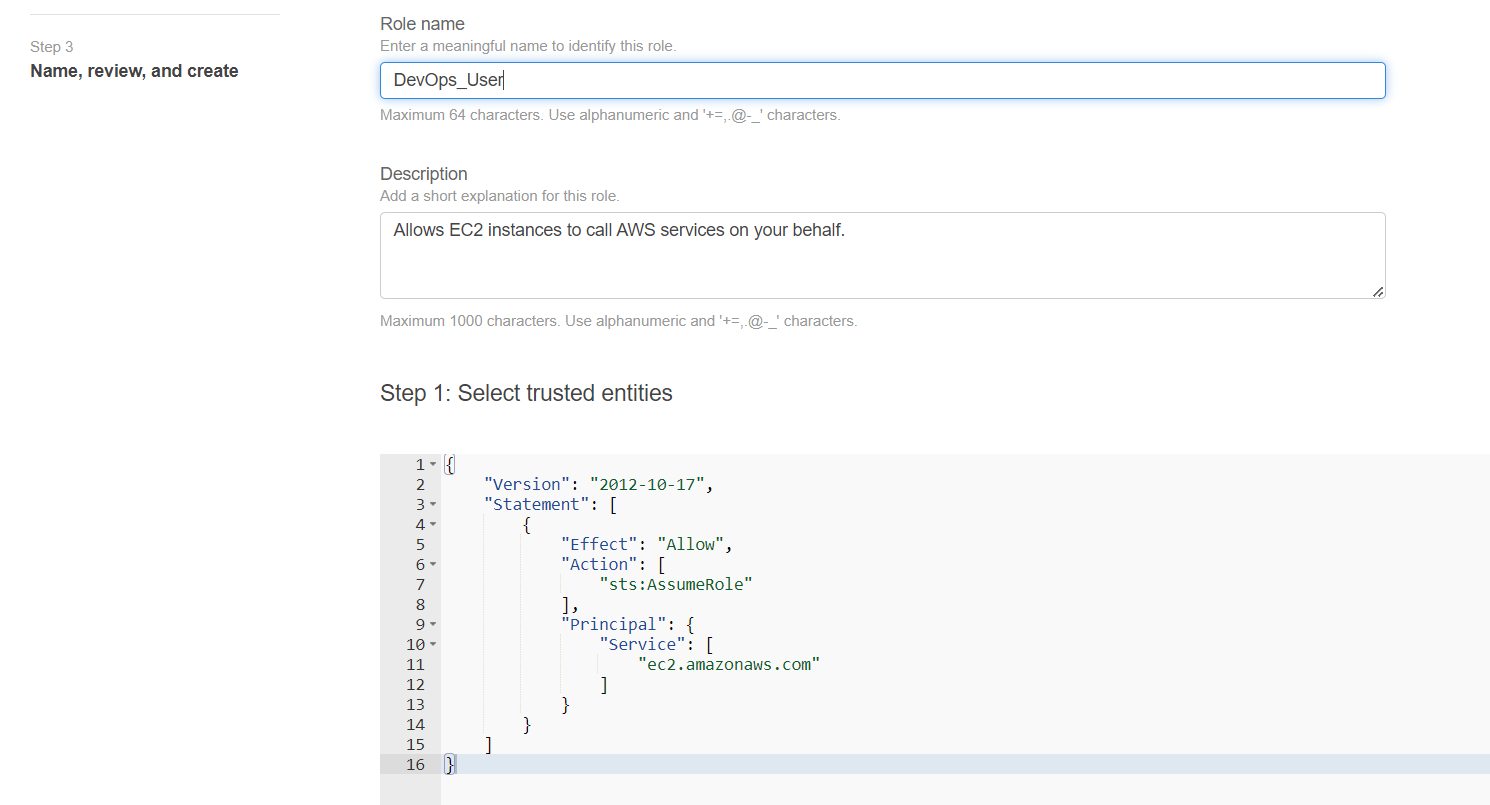
For each role, you want to create—DevOps-User, Test-User, and Admin—repeat the aforementioned procedures.
Build the Test-User role.
Build the Admin role.
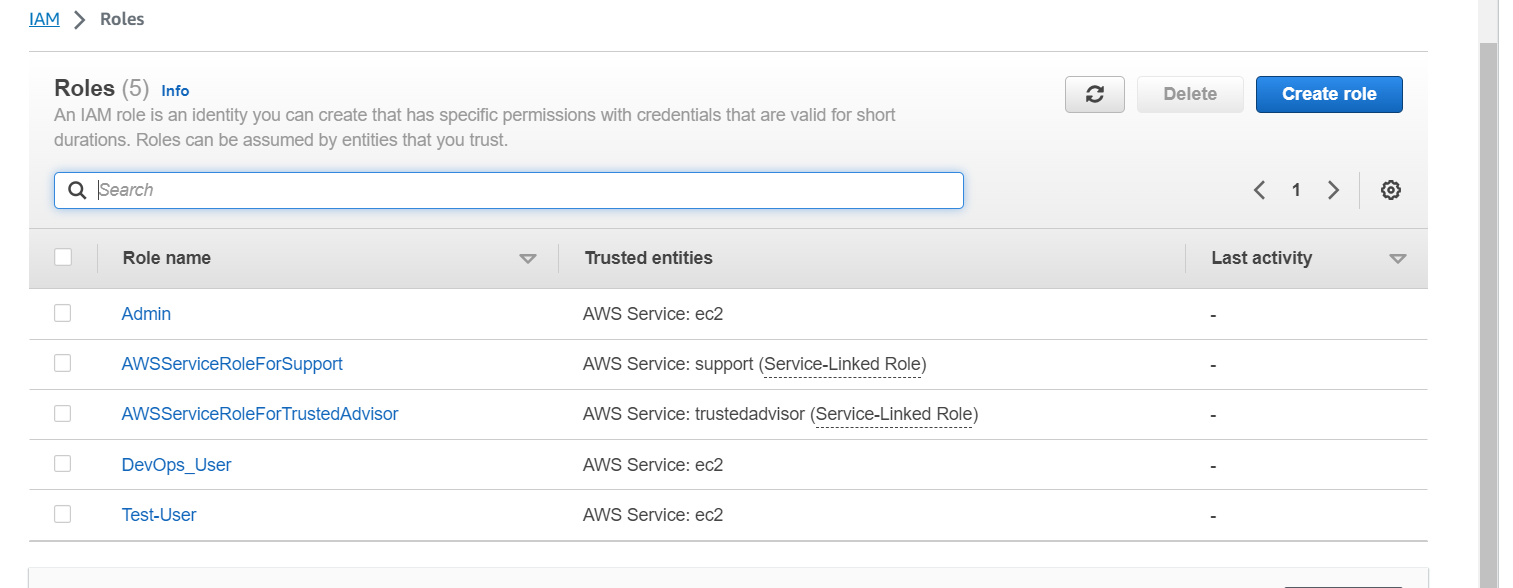
Once the roles are created, you can assign them to individual IAM users or groups as needed, and control their access to AWS resources.
Happy Learning :)


